
The LAMP stack is a collection of open-source software used to develop web applications. It consists of four components:
- Provide a step-by-step guide for installing LAMP stack on Ubuntu
- System requirements for installing LAMP stack
- Updating Ubuntu and installing necessary packages:
- Installing Apache web server
- Configuring Apache to start automatically on boot
- Installing MySQL database server
- Configuring MySQL security setting
- Installing PHP
- Testing the PHP installation
- Testing the LAMP stack
- Create a PHP test file and access it from a web browser
- Troubleshooting tips for common issues
- Conclusion
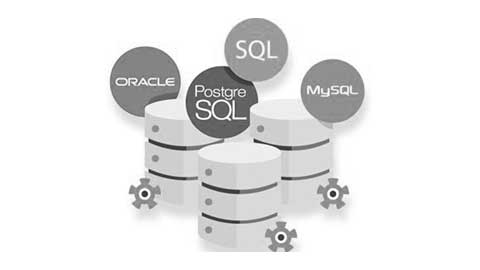
- Linux – the operating system
- Apache – the web server
- MySQL – the database management system
- PHP – the scripting language
LAMP stack is widely used and popular among developers as it offers a cost-effective and flexible solution for web development. The LAMP stack has been around for over two decades and has a vast community of developers who contribute to its development and improvement. It provides a complete, reliable, and scalable framework for building and deploying web applications, from simple blogs to complex e-commerce platforms.
Moreover, the LAMP stack’s open-source nature allows developers to access and modify the source code, making it highly customizable and extensible. The LAMP stack’s ease of use and flexibility have made it an essential tool for developers worldwide, making it one of the most popular web development stacks available today.
Provide a step-by-step guide for installing LAMP stack on Ubuntu
- Update your system’s package list by running the following command in the terminal:
sudo apt-get update- Install the Apache web server by running the following command:
sudo apt-get install apache2- Once the installation is complete, you can start the Apache service with the following command:
sudo systemctl start apache2- Check if the Apache web server is running by accessing your server’s IP address or domain name in a web browser. You should see a default Apache page if the installation was successful.
- Install MySQL by running the following command:
sudo apt-get install mysql-server- During the installation process, you will be prompted to set a root password for the MySQL server. Enter a strong password and remember it as you’ll need it later.
- Once the installation is complete, you can start the MySQL service with the following command:
sudo systemctl start mysql- Run the following command to secure your MySQL installation:
sudo mysql_secure_installation- Follow the prompts to set a secure root password, remove anonymous users, disallow root login remotely, and remove the test database.
- Install PHP by running the following command:
sudo apt-get install php libapache2-mod-php php-mysql- Once the installation is complete, restart the Apache web server with the following command:
sudo systemctl restart apache2- Create a PHP test file to test your installation. Run the following command to create a file called info.php in the Apache web server’s root directory:
sudo nano /var/www/html/info.php- Add the following code to the file:
<?php
phpinfo();
?>- Save the file and exit the text editor.
- Access the file by entering your server’s IP address or domain name followed by /info.php in a web browser. You should see a PHP information page that confirms that the LAMP stack is installed and working correctly.
That’s it! You now have a fully functional LAMP stack on your Ubuntu server.
System requirements for installing LAMP stack
- Ubuntu 18.04 or later installed on a 64-bit system.
- At least 1 GB of RAM is recommended, although you can get by with as little as 512 MB.
- At least 1 GHz processor.
- At least 10 GB of free hard drive space to store the Ubuntu operating system and other software components. However, more storage space may be required if you plan on hosting large web applications or databases.
It’s worth noting that the above specifications are minimum requirements, and you may need more powerful hardware if you plan to run resource-intensive web applications or handle a large number of website visitors. Additionally, keep in mind that some web applications may have their own specific system requirements, so be sure to check the software’s documentation before installation.
Updating Ubuntu and installing necessary packages:
- Open a terminal window by pressing Ctrl+Alt+T or by searching for “terminal” in the application launcher.
- Update the package list by running the following command:
sudo apt-get udpate- Upgrade installed packages to their latest versions by running the following command:
sudo apt-get upgrade- Depending on your system, you may be prompted to enter your password and confirm the upgrade process. Follow the on-screen instructions to complete the upgrade.
- Once the upgrade is complete, you can install the necessary packages for the LAMP stack by running the following command:
sudo apt-get install apache2 mysql-server php libapache2-mod-php php-mysql- During the installation process, you will be prompted to set a root password for the MySQL server. Enter a strong password and remember it as you’ll need it later.
- Follow the on-screen instructions to complete the installation of Apache, MySQL, and PHP.
That’s it! You now have a fully updated Ubuntu system with the necessary packages installed for the LAMP stack. You can continue with the LAMP stack installation by following the steps for installing Apache, MySQL, and PHP as detailed in the earlier response.
Installing Apache web server
- Open a terminal window by pressing Ctrl+Alt+T or by searching for “terminal” in the application launcher.
- Update the package list by running the following command:
sudo apt-get update- Install Apache using the following command:
sudo apt-get install apache2- Depending on your system’s configuration, you may be prompted to enter your password or confirm the installation process. Follow the on-screen instructions to complete the installation.
- Once the installation is complete, you can start the Apache service with the following command:
sudo systemctl start apache2- To check if Apache is running, you can visit your server’s IP address or domain name in a web browser. You should see a default Apache page if the installation was successful.
That’s it! You have now installed Apache on your Ubuntu system using the package manager. You can further configure Apache by modifying its configuration files located in the /etc/apache2 directory.
Configuring Apache to start automatically on boot
- Open a terminal window by pressing Ctrl+Alt+T or by searching for “terminal” in the application launcher.
- Run the following command to enable the Apache service to start automatically on boot:
sudo systemctl enable apache2- That’s it! The Apache service will now start automatically every time you boot your system.
If you want to check the status of the Apache service, you can use the following command:
sudo systemctl status apache2This will display the current status of the Apache service, including whether it is running or stopped, and any errors or warnings that may have occurred.
Installing MySQL database server
Installing MySQL on Ubuntu is a simple process that can be completed using the Ubuntu package manager. Here are the steps to install MySQL:
- Open a terminal window by pressing Ctrl+Alt+T or by searching for “terminal” in the application launcher.
- Update the package list by running the following command:
- Install MySQL using the following command:
sudo apt-get updatesudo apt-get install mysql-server- Depending on your system’s configuration, you may be prompted to enter your password or confirm the installation process. Follow the on-screen instructions to complete the installation.
- During the installation process, you will be prompted to set a root password for the MySQL server. Enter a strong password and remember it as you’ll need it later.
- Once the installation is complete, you can start the MySQL service with the following command:
sudo systemctl start mysql- To check if MySQL is running, you can use the following command:
sudo systemctl status mysqlThis will display the current status of the MySQL service, including whether it is running or stopped, and any errors or warnings that may have occurred.
That’s it! You have now installed MySQL on your Ubuntu system. You can connect to the MySQL server using the command line client by running mysql -u root -p and entering your root password when prompted. From there, you can create databases, tables, and manage users and permissions.
Configuring MySQL security setting
Configuring MySQL security settings is an important step to ensure that your database is secure. Here are the instructions for configuring MySQL security settings:
- Open a terminal window by pressing Ctrl+Alt+T or by searching for “terminal” in the application launcher.
- Start the MySQL service by running the following command:
sudo systemctl start mysql- Run the following command to launch the MySQL security script:
sudo mysql_secure_installation> Follow the on-screen prompts to secure your MySQL installation. The script will ask you a series of questions and provide options for securing your installation, such as:
- Removing anonymous users
- Disallowing root login remotely
- Removing the test database
- Reloading the privilege tables
> Set a strong password for the MySQL root user when prompted. This will help prevent unauthorized access to your database.
> Once the script completes, you can check the status of the MySQL service with the following command:
sudo systemctl status mysqlThis will display the current status of the MySQL service, including whether it is running or stopped, and any errors or warnings that may have occurred.
That’s it! You have now configured the security settings for your MySQL installation. It’s important to regularly update your MySQL installation and maintain strong passwords to ensure the security of your database.
Installing PHP
Installing PHP and its related modules on Ubuntu using the package manager is a simple process. Here’s how you can do it:
If you are interested in learning PHP or you are new to PHP, then this course is for you. Nowadays PHP is one of the most important course and an advantageous one to learn these days. So let’s get started.
- Open a terminal window by pressing Ctrl+Alt+T or by searching for “terminal” in the application launcher.
- Update the package list by running the following command:
sudo apt-get update- Install PHP and its related modules using the following command:
sudo apt-get install php libapache2-mod-php php-mysqlThe libapache2-mod-php package installs the Apache module that enables PHP to work with Apache, and php-mysql installs the MySQL extension for PHP.
- Depending on your system’s configuration, you may be prompted to enter your password or confirm the installation process. Follow the on-screen instructions to complete the installation.
- Once the installation is complete, you can test PHP by creating a PHP file in the Apache document root directory:
sudo nano /var/www/html/info.php- Add the following PHP code to the file:
<?php
phpinfo();
?>- Save and close the file.
- Restart the Apache service to apply the changes:
sudo systemctl restart apache2- To test the PHP installation, visit the info.php file in a web browser by entering your server’s IP address or domain name followed by /info.php (e.g., http://localhost/info.php). You should see a PHP info page if the installation was successful.
That’s it! You have now installed PHP and its related modules on your Ubuntu system using the package manager.
Testing the PHP installation
After installing PHP on Ubuntu, you can test the installation to make sure it’s working correctly. Here’s how you can test the PHP installation:
- Open a terminal window by pressing Ctrl+Alt+T or by searching for “terminal” in the application launcher.
- Create a new PHP file named test.php in the Apache document root directory:
sudo nano /var/www/html/test.php- Add the following PHP code to the file:
<?php
phpinfo();
?>- Save and close the file.
- Open a web browser and enter your server’s IP address or domain name followed by /test.php (e.g., http://localhost/test.php). This will display the PHP info page generated by the PHP code you added to the test.php file.
- If you see a PHP info page that displays information about your PHP installation, then the installation was successful.
That’s it! You have now tested the PHP installation on your Ubuntu system. If you encounter any issues, make sure that PHP is installed correctly and that the PHP file has the correct extension (.php) and syntax.
Testing the LAMP stack
After installing the LAMP stack on Ubuntu, you can test the installation to make sure that Apache, MySQL, and PHP are all working correctly. Here’s how you can test the LAMP stack:
- Open a terminal window by pressing Ctrl+Alt+T or by searching for “terminal” in the application launcher.
- Create a new PHP file named test.php in the Apache document root directory:
sudo nano /var/www/html/test.php- Add the following PHP code to the file:
<?php
phpinfo();
?>- Save and close the file.
- Open a web browser and enter your server’s IP address or domain name followed by /test.php (e.g., http://localhost/test.php). This will display the PHP info page generated by the PHP code you added to the test.php file.
- If you see a PHP info page that displays information about your PHP installation, then PHP is working correctly.
- Next, test MySQL by running the following command in the terminal:
mysql -u root -p- You will be prompted to enter your MySQL root password. If you successfully enter the password, you will be taken to the MySQL shell prompt. Enter the following command to display the list of databases:
SHOW DATABASES;- If you see a list of databases, then MySQL is working correctly.
- Finally, test Apache by entering the following command in the terminal:
sudo systemctl status apache2- If Apache is running, you will see the status message that indicates that the service is active and running.
That’s it! You have now tested the LAMP stack on your Ubuntu system. If you encounter any issues, make sure that each component is installed correctly and that your PHP file has the correct extension (.php) and syntax.
Create a PHP test file and access it from a web browser
To create a PHP test file and access it from a web browser, you can follow these steps:
- Open a text editor, such as Nano or Gedit.
- Create a new file and add the following PHP code:
<?php
phpinfo();
?>
This code will generate a PHP info page that displays information about your PHP installation.
- Save the file with a .php extension (e.g., test.php) in the Apache document root directory, which is typically located at /var/www/html/.
- Open a web browser and enter your server’s IP address or domain name followed by /test.php (e.g., http://localhost/test.php). This will display the PHP info page generated by the PHP code you added to the test.php file.
If you see a PHP info page that displays information about your PHP installation, then PHP is working correctly. You can use this test file to verify that your LAMP stack is installed and configured correctly.
Note that if you make changes to the PHP file, you will need to save the file and refresh the web browser to see the updated output.
Troubleshooting tips for common issues
Here are some troubleshooting tips for common issues that you may encounter when working with the LAMP stack on Ubuntu:
- If you’re having trouble accessing your PHP test file, make sure that the file is located in the correct directory (typically /var/www/html/) and that it has the correct file permissions. You can check the permissions by running the command ls -l /var/www/html/ in the terminal.
- If Apache is not starting, make sure that there are no syntax errors in the Apache configuration files (located in the /etc/apache2/ directory) by running the command sudo apachectl configtest in the terminal.
- If MySQL is not starting, check the MySQL error log (located in the /var/log/mysql/ directory) for error messages that may indicate the problem.
- If PHP is not working correctly, make sure that the necessary PHP modules are installed by running the command sudo apt-get install php-<module name> in the terminal. You can also check the PHP error log (located in the /var/log/apache2/ directory) for error messages that may indicate the problem.
- If you’re experiencing performance issues, make sure that your server meets the system requirements for the LAMP stack and that you have optimized the Apache and MySQL configuration files for your system. You can find many online resources and tutorials that provide guidance on how to optimize the LAMP stack for performance.
- If you’re experiencing security issues, make sure that you have secured your server by setting up a firewall, configuring secure passwords, and applying security patches and updates regularly.
- If you’re still having issues, consider seeking help from the Ubuntu community or from a professional system administrator who has experience with the LAMP stack.
Conclusion
This article provided a comprehensive guide on how to install, configure, and test the LAMP stack on Ubuntu. The LAMP stack is a popular web development platform that consists of Linux, Apache, MySQL, and PHP. The key points covered in this article include:
- The system requirements for installing the LAMP stack on Ubuntu
- How to update Ubuntu and install necessary packages
- How to install and configure Apache web server
- How to secure Apache by enabling firewall and configuring SSL
- How to install MySQL database server and configure security settings
- How to install PHP and related modules using the Ubuntu package manager
- How to test the LAMP stack by creating a PHP test file and accessing it from a web browser
- Troubleshooting tips for common issues that may arise when working with the LAMP stack on Ubuntu
By following the steps outlined in this article, users can successfully set up and test the LAMP stack on Ubuntu for web development purposes.
The LAMP stack is a powerful and versatile platform that can be used for a wide range of web development projects. With Linux as the operating system, Apache as the web server, MySQL as the database management system, and PHP as the scripting language, developers have everything they need to create dynamic and interactive web applications.
By learning more about the LAMP stack and experimenting with building their own websites, readers can gain valuable experience and develop their skills as web developers. There are many online resources and tutorials available that can help users get started with the LAMP stack, including documentation from the Ubuntu community, video tutorials, and code repositories on GitHub.
Whether you’re building a personal blog, an e-commerce website, or a web application, the LAMP stack provides a solid foundation for your project. So don’t be afraid to dive in and start building! With some time and effort, you can become proficient in using the LAMP stack to create powerful and engaging web applications.